Sunday 31 January 2016

Guys and Gals

I've got a couple of cards to share today - one for a guy and one for a girl.

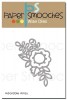
For the guy card I used my favourite item from the new SugarPea designs release - I love the lumberjack from the Timber stamp set and he pairs perfectly with the log cabin mountainscape die too so I had lots of fun layering up a background to sit him on.


I cut the die 3 times on pieces of white card and on 2 of them cut off the mountains and cabin so I just had the trees.   I also cut a few additional trees by running the die through again on scraps of card and adding them into the gaps on the lower hills.  I did some very basic water colouring - its so not my medium - but it works well for getting soft background colour.

To create the log cabin in the foreground, I simply cut strips from a sheet of our own Seven Hills Crafts sticky backed wooden veneer sheets and rounded the edges so they looked like logs and then build them up over a brown background.  I stamped the tree stump onto the same veneer and cut it out.

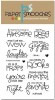
My lumberjack is stamped onto nina card stock and coloured with copics with a little pencil work on top for the fine detail in his beard and shirt before fussy cutting him out.   Whilst it's aimed at Valentine's - you can certainly use this set all year round for masculine birthdays.  I can see some Monty Python sentiments coming for mine ;-)

So I had lots of fun and spent a good while making that card, but given my schedule, I don't always have the time for "all out" crafting like that, so the new items we got in store today are PERFECT for quick card making.   So I made a quick girly card using some new papers from My Minds Eye.


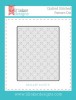
I used a single sheet of double-sided papers from the Hello Gorgeous paper pad, the leafy strip is the reverse of the floral sheet. and paired it with one of the new journal cards that matches it.  These are just beautiful and perfect for card making as well as project life style journalling.  Start to finish card in under 2 minutes - just what you need for that "oh no I forgot it" event!


NEWS FROM THE STORE

  • We've just had some restocks from Hero Arts - the big new release is expected mid-late February.
  • We are expecting the new releases from the following brands this week:
  • My Favorite Things
  • Wplus9
  • Altenew
  • and possibly Lil' Inker Designs towards the end of the week

Catch you next week

Tara


Saturday 30 January 2016

Inlay Die-Cutting on Acetate

Hi crafters, today I have a rather simple card for you – well, it looks simple, but I used a few tricks to get the look that I wanted. I had a few failed attempts with this card, too, so here's what came of it:


I started out by die-cutting the Adorable Array by Paper Smooches from watercolor card stock and then used my ZIG Markers to color it. You can use regular card stock and color it with pencils or Copics or whatever medium you prefer – do what feels best for you. Then I wanted this floral pieced to "hover" over my card base. Cutting tiny pieces of foam tape was out of the question, since I didn't want anything to attach the shape to the card. I tried adding glue to the edge of the die cut and fitting it back into the panel – let's just say it was a terrible mess and total failure. So in the end I grabbed a piece of acetate and added my floral piece on top of that.


For the bottom layer, I wanted to add something extra, but I didn't want it to distract from the rest of the card. I grabbed an impression plate by Lil' Inker Designs and added the stitched pattern to only a portion of the panel by having the rest hang off – you only die cut or emboss what's between your cutting plates.


A strip of two-sided adhesive tape provided a surface for my glitter which covers  up the transition between the pattern and non-embossed part of the panel. I did have a bit of trouble getting the sentiment stamped because I simply forgot about it until I had adhered the panel to my card, so there were some spaces without foam tape and of course that's where I wanted my sentiment. I salvaged it somehow, but I wonder if I will _ever_ learn to simply stamp the sentiment before I attach my stuff to a card.


I hope you enjoyed today's project! Catch you again soon.

Friday 29 January 2016

Monkey Business.

Hi everybody,

Jill here, and today, I'm monkeying around...


...with the new release from MFT, Monkey Business...


How cute are these little chaps?  I'm really excited to start building up my MFT's collection from the store - and with sets like this - who can blame me?!
I wasn't sure where I wanted to go with this card when I first started, I just knew I couldn't wait a minute longer to ink these cheeky monkeys up!  I stamped a few of them out, (the set actually contains FIVE different monkeys - all as cute and fun as the next), masking each one as I went to create my little scene.  I added the little mound from another new MFT set, 'Ewe are the best', (another insanely cute set that I could not resist), to give them a little beachy verge to hang out on.
I coloured them with my Copics, and masked them off once again to create an inky background.  The sentiment is included in the Monkey Business set, along with a load of other funny phrases that I just think will be great for so many different people and occasions.  Once I'd finished my little scene, I decided I'd turn it into a full frontal shaker.  You get a load of extra banana's in the set, and I thought it would be fun to colour and cut a load out to add as little shaker elements, so that's what I did!


I also used the 'loose banana' stamps to add interest to my kraft card frame, and added a bunch of, yup you guessed it, bananas, to finish off my card.


I really hope you like it, and I can't wait to see what mischief you all get these little fellas into with your creations!

As always, everything I used is linked below so be sure to check it out.

See you next week.

Jillx


Cheeky Monkey StampEwe Are The Best Stamp

Thursday 28 January 2016

Whale-ly Big Shaker


Hello and happy Thursday!

I recently just got Avery Elle 'Whale Hello' and 'Swim Team Elle-ments' these sets work great together- and the die set would work with any sea/ocean type projects.


I thought it would be fun to use the sets for a large shaker- so thats what I have done. The whole front of my card is a shaker, but I cut some blue velum using the large wave from the Swim Team dies and added this ontop of the acetate part of the shaker, you can still see all the fun sequins and beads through the velum too.

The fun sentiment is from the Whale Hello set and it has such fun sentiments to go with the whale images.

Thank you so much for stopping by, I hope you have a beautiful day.

Hugs Lydia xxx


Wednesday 27 January 2016

Hugs and Kisses

Hi, I'm standing in for Kate today as she has all her crafty stuff packed up for moving and is finding it hard going cold turkey with no crafting!

My card today is inspired by a song - I am really loving "Ex's and Oh's by Elle King" at the minute so I took my inspiration from the title and the new layers of love die set from Concord and 9th.   The die as the title implies gives you hearts you can layer up but on this card, I actually just used the waste from one of the 3 dies.


I inked up a scrap of white card with two shades of distress ink to give an ombre effect from pink to purple and then die cut the stripey heart after applying some stick-it to the back of the card for ease of application.  I used a bit of washi to hold the die cut in place and then popped each negative into its space before removing the die (saving it for another project)  I forgot to photograph it as I did it, but here's a shot which sort of shows you what I mean!


The sentiment is a die cut from Mama Elephant's "Type It" set, die cut from black card stock and given a thick coat of glossy accents.

Here's the quick card I made with the main die cut.  I added a scrap of dotted paper from the smitten pad from MFT using the floral outline die and a tonal "hello" from Mama Elephant as hearts aren't just for valentines!  To finish I filled in the holes punched by the floral frame with black glossy accents.


This is a really versatile die set - great value for money too with lots of looks from one product.

That's me for today - catch you on Sunday.   Kate should be back for her normal round of fabulousness next week.

Tara


https://sevenhillscrafts.co.uk/products/adhesives.html


Tuesday 26 January 2016

You Are Amazing - Design Team Blog Hop

Hello crafty friends! Today we have a surprise for our fearless leaders, Tara and Rick, the owners of the Seven Hills Crafts store.

As most of you will have noticed, Tara and Rick have launched a complete rebranding of what used to be "Make The Day Special", with the major update being a completely new website for the store. Now, I won't bore you with all the technical details, but let me tell you that this was a monumental effort because all the stamps, dies, inks, etc. that we covet so much have to be added by hand. All 4,000+ of them. If you get bored after working on a complicated spreadsheet after an  hour, imagine how this must have felt :)

So, we – the Design Team – wanted to say "thank you" to Tara and Rick for the amazing work they have done over the christmas holidays and for continuing to bring all those fantastic US crafting supplies to us here in Europe. They are such an essential part of the crafting community!

To celebrate them both, we have created a few cards which are hopefully in their mailbox today. Here's a sneak:


Please visit the blogs of the Design Team to see the full cards. And leave Tara and Rick a nice comment on the blog here – I am sure they'd love to hear from you! Thank you for supporting Seven Hills Crafts!


Julia & the entire Design Team

Monday 25 January 2016

Birthday Food


Hi there,

Well if my Pizza card last week, didn't manage to make your mouth water,
  I think this weeks card will definitely do the trick
Yep... I'm using that yummy pizza set again and teaming it up with Let's BBQ
which is also by Lawn Fawn.....


It was that slice of pizza that made me think of swapping images for letters and the BBQ set happily obliges too :) I've used Quinns ABC's alphabet to make up the rest of my greeting but as this is currently out of stock you could easily change this to any other alphabet stamps or dies you may have... Finleys ABC's jumps to mind :)


I've stamped coloured and die cut all the components before mounting
 them onto an embossed panel (sorry....embossing folder from my own stash not the store)
then added thin strips of black card to frame the greeting... I love how it turned out and I have another 'guys' card for my collection too.. Yay ;)


Thanks for stopping by :)
Jenny x

Sunday 24 January 2016

January Challenge Week 3

It's your final reminder to play along in our prize challenge this month.  You have until 10pm on Friday 29th January to join in the fun.

ll you have to do is make a project on ANY theme, using AT LEAST 3 colours from ONE of the 3 colour palettes below.

Keren is bringing you the final bit of inspiration - Kate will be back to play next month as she's busy moving at the minute.

Keren
Keren chosen the first colour scheme and used the beautiful Garden Flourish Background stamp from MFT

Once you've made your project, link it up to our 
Challenge page by 29th January.

Happy New Year!

No, I've not gone back in time or forgotten the date - today I'm sharing a New Year Card Chinese style!   Chinese New Year falls on 8th February and this year we are entering the year of the monkey so I put a couple of new sets together from different brands and came up with this.


I combined Mama Elephant's Lunar Extras with My Favorite Things Cheeky Monkey and Mini Note Die with lots of red and gold which are the colours of Chinese New Year as they are thought to bring prosperity.   The traditional gift is a red envelope full of money so I made a mini note envelope from red card and embossed the "Happy  New Year" in gold on it.   I coloured the monkey with copics and stamped a few gold coins from the Lunar set and popped those in his hand.  I had him poking out of the envelope like a proper cheeky monkey!   An extra sentiment, a strip of card and some gold washi add interest to the plain background.

NEWS FROM THE STORE
  • We've had the new release from SugarPea Designs this week - you can find that in our new arrivals section 
  • The new release from Concord and 9th will be here this week
  • We are hoping to get the new release from Altenew before the end of the month but as DHL's hub on the east coast may be hit by the storm, there is likely to be a delay in shipments whilst flights catch up etc.
  • The new mini release from Reverse Confetti sold out before we could get it.  We will order it when it comes back into stock but we may not be able to get the bags and matching dies as they are exclusive to them.
  • We will have some Hero Arts restocks next week - the new CHA release has not yet hit the UK distributor so that will be a little while yet.  
  • We will have the new papers from My Minds Eye shortly and have massive orders from Echo Park for some amazing papers and co-ordinating dies coming in February and March.
  • The remaining CHA releases (Lawn Fawn, Avery Elle etc) will arrive towards the end of February.

Don't forget to join in our monthly challenge - we'll have one final inspiration post for you on that this afternoon!

Tara

Saturday 23 January 2016

Rainbows and Elephants

Howdy, crafters! My card was inspired by two cards I saw online by Francine Vuilleme and Debra James. Now, I have tried to create water colored rainbow cards in the past and I failed miserably. I ended up with an unattractive mess of brown patches and a high frustration level. This time, I put my brain to use before I started and dragged up the old color theory I was taught in school. You know what the trick is? Follow the color wheel!


Even though I used two different types of watercolor markers, you can easily just use one type of watercolor medium. I am totally afraid of using wet or fluid colors (like picking up color with my brush from the Gansai Tambi color pans) so using markers is my preferred way of working with watercolor. You could also use your Distress Markers or your ZIG Clean Color Real Brush markers. As long as you follow the colors in the color wheel, you will achieve the same effect.


After I had mounted the elephant on my card base, I used a Mini Mister filled with water into which I had mixed Perfect Pearls to add a lot of sparkle and shine to the elephant. It really looks gorgeous in real life. Since you are using watercolor, be careful when you spray your colored image. The water in the mist will reactivate your watercolors and maybe make them run.


This sentiment is of course from the wonderful stamp set designed by Jennifer McGuire and is just perfect for the person that I'm sending it to.

I hope you got inspired and you will give the rainbow water coloring a try. It's definitely not an easy technique, but I think a little bit of practice will let you master it quickly and you will get breathtaking results.

If you want to actually watch me create this card, head on over to my blog (link in the sidebar to your right) and watch the video! Catch you again soon and have a wonderful weekend!

Friday 22 January 2016

Enjoy the small things

Hi everybody,

Jill here, and today, I am looking forward to, what will hopefully be, a beautiful Spring...


...with a sweet, simple, pastel, Paper Smooches scene.


If you got the chance to check out our 'favourites of 2015' blog series at the end of last year, you'll know Paper Smooches made a massive come back for me last year - and this cute little 'Birds' die was another knock-out in my opinion.  What can I say?  It is just soooo sweet!


I cut my pieces and coloured them all with my Copics, leaving the outline edge white.
I then created a soft pastel watercolour wash background using Distress Ink, added a few flicks and splashes to it, and adhered my pieces in place.  I wanted my card to be a nod towards the new, upcoming year, looking forward to Spring and new things to come, so thought this sentiment from 'Eveyday Sentiments' would work perfect.  I stamped it out and heat embossed in Black Sparkle for a little extra interest.

I wanted to keep my card as sweet and simple as the scene that inspired it so, after adding a quick slick of Glossy accent to my cute little birdies, decided to leave it there.

I really hope you like it.  As always, everything I used can be found in the beautiful new store, and is all linked up below.

See you next week.

Jillx

Birds DieEveryday Greetings