The Hello Sunshine stamp set from Altenew has been on my wish list for a while, so I was excited when the Altenew restocks came in recently and I managed to get hold of it.
I love the illustrative style of these flowers and leaves. I thought they would look great in black and white as there is a lot of detail to them.

I planned to use a stitched rectangle frame so I masked off the edges of a white card base so no stamping would appear outside the frame. I stamped directly onto the card base with black ink, to make a floral frame.
Next, I chose an accent colour (MFT Razzle Berry dye ink) and blended on some ink in two opposite corners of the rectangle frame, softening the colour out to white. I then added this to the card with liquid glue.
I die cut the Neat & Tangled Celebrate word die from white card, and blended on the same ink at the bottom, gradually fading to white. I added this to the card too, then stamped in the same pink ink, a small greeting from the Avery Elle Sentimental stamp set.

I toyed with adding some pink sequins but decided to keep the accent colour to a minimum and used clear sequins instead.
This is a simple design to recreate with any of your floral stamp sets, but I think it works particularly well with Altenew Hello Sunshine.

Thanks for joining me today,
Gemma
 |
| MFT Single Stitch Rectangle Frames |
 |
| Neat & Tangled Celebrate |
 |
| Avery Elle Sentimental |
 |
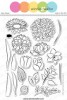
| Altenew Hello Sunshine |
 |
| MFT Ink Cubes Set 9 |